|
Hello fellow crafty people. :)
I took part in a “Peggy Square day” at the Auckland Museum where people knitted and dropped off hundreds of Peggy Squares, and some of us tried to sew them together into blankets.
I've learned a lot from that session. Wool is far, far, far better than acrylic. It just is. If I did one of these again my aim would be to get as many real-wool squares sewn together on the day into good blankets as possible, rather than just get a huge number of any-old-quality squares sewn into no really complete blankets at all despite a large number of people working busily all day. Half the number of real wool blankets will do much more good keeping people warm than twice as many acrylic ones – and they'll last longer too, as well as being naturally fire-resistant, warmer when wet, better at wicking away moisture and "greener" over their lifetime into the bargain.

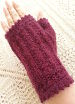
Note that I have left the tails attached to be used later for sewing up.
|
So here are some thoughts I thought I'd share with you if you'd like to do a "Really Successful Knitted Squares Collaboration Blankets" project.

All six of the basic patterns joined together.
|
Number 1: has to got to be – We need a way to make all the squares the same size, or pretty much so. Let's say 15cm x 15cm – but you can choose what you want for your project.
Number 2: We need edges that are easy to sew together – and preferably all the same so that we are not trying to join cast-on and off edges to selvedges etc. So how about we have almost nothing but selvedges (since we can't have almost nothing but cast-ons or cast-offs and often people do these too tightly anyway)?
Number 3: We need plenty of matching yarn for sewing up OR we need enough yarn of one colour that we can successfully join all the squares in a blanket.
There are 2 solutions:
Ask everyone to leave a long tail at the start and end. We work out from our seaming method how much they'll need to leave (the garter-pip join is my recommendation, it is fast, flat, flexible, economical on yarn, easy to teach and looks good in pretty much any colour because it just about disappears). If the tails are long enough to sew up two sides and have 10cm or so left over to finish off and weave in the end then it is likely all the sewing up wool needed will be with the squares, and in the right colours, already attached so one less end for the sewing-uppers to weave in.
The second solution is for us to crochet or sew them together with yarn that we have balls of at the sewing-up venue. I recommend black for all the darker coloured blankets and white for joining together the pastel coloured blankets if we have people that want to crochet them together (which uses more yarn, but can be good and I won't turn it down if it gets a blanket done).
Number 4: We need something that is easy for beginners, but also allows for more challenging variations for experienced knitters.
Number 5: We need any other ends from stripes, joining in a new ball etc. woven in by the knitters when they make the squares.
Number 6: On the day we need an ARMY of sewing-uppers and someone(s) to organise them along with a well-lit space where it is okay for them to have food and snacks. Let's say we want blankets 7 squares wide by 7 squares long - give them 7 squares at a time and ask them to sew them into long strips, without cutting off or weaving in the tails. When you have 7 strips completed give them to someone and ask them to sew the strips together to make a blanket, without cutting off or weaving in the tails. Now give someone the finished blanket and ask them to check that all the squares really are joined and then weave and trim off all the left-over tails. (One person can do the whole thing, of course, but this “production assembly method” is efficient and helps everyone see progress for their efforts.)
Number 7: Watch the blankets pile up!
Now this is all very well, I hear you thinking, but what square do we get them to knit? Using the same principle as old-fashioned counterpane squares (those knitters in the past knew a thing or two about thrifty knitting) I give you...
The Meggy Square, a free knitting pattern by Megan Mills, 2016
This square looks good all one colour and half one colour/half the other colour. Have a look, for example, at all the quilt designs for half-square triangles! Self-patterned and ombre yarns work well too. Stripes are good but you'll have more ends to weave in. Also, if you carry the yarn up the selvedges they are much harder for you to sew together.
The pattern is available here.
A useful design grid for printing out and planning is here.
I hope you enjoy making them... Megan
Faked cot-sized example, uses 6 x 10 motifs with 15cm / 6" squares:
Faked single bed-sized example, uses 9 x 14 motifs with 15cm / 6" squares:
Uses only three different design motifs: two different solid colours & one diagonal dual colour.
Home Page and more Patterns
© Megan Mills, 25th October 2016
|