|
|
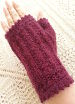 Hand Warmers |
 Mitred Corner |
 Crocheted Ribbing Seam Tutorial |
 Nappy Cake |
 Tiramisu Recipe |
 Bowl Cover |
 Blocking Howto |
 Rose Howto |
 Bowl Cover |
 Collar |
 Crochet Curved Edging |
|
Filet Mat |
|
Filet Mat |
 Estonian Lace |
 Counterpane |
 Quick Knit Poppy |
 Meggy Square |
 Slippers |
 Flat Slippers |
 Crochet Beret |
 Prime Rib Hat |
 Bicolour Hat |
 Bicolour Cosy |
 Tea Cosy |
 Tissue box cover |
|
Baby Jacket |
 Seamless Bootee |
 Mitres Tutorial |
 Crochet Butterfly |
 Crochet Pelerine |
 Swan Doilies |
 Crochet Brioche Hat |
 Crochet Brioche Tea Cosy |
 Puffy Rib Cosy |
 Crochet Coffee Plunger Cosy |
 Rosy Cosy |
 Roses Afghan |
 Hexagonal Motif |
 Crochet Rose |
 dc HowTo |
 Tutorials Tidy Ends Change Colours Back Ridge Starting Chain Mystery Stitch Knitting: Buttonholes Twice Knit Increase/Decrease |
 Crochet Square Tutorial |
 Tatting Bobbin Lengths Chart |
 Crochet Square |
|
Granny Rectangle |
 Crochet Bib |
  Soccasins & Mary Janes |
 Crochet Bootee |
 Crochet Bootee |
Reversible 'Crochet Brioche' Tea Cosy
A Free Crochet Patternby Megan Mills
megan@kiwi.gen.nz
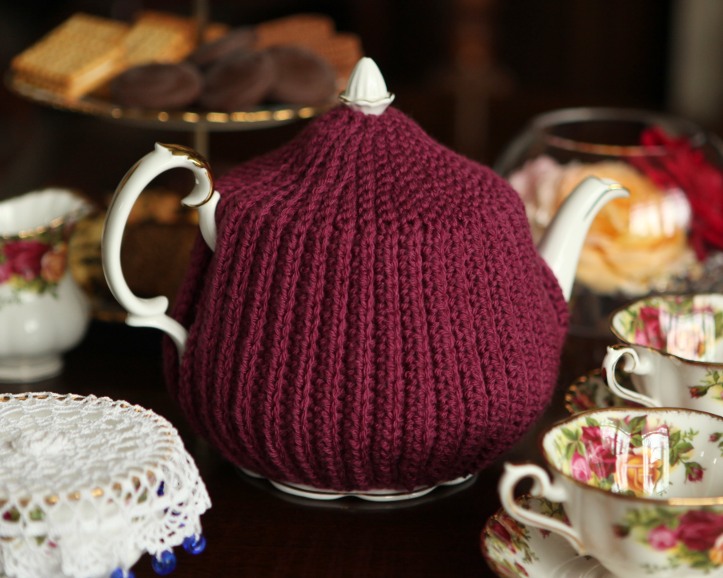 Crochet Brioche Tea Cosy |
|
Hello fellow crafty people. :) I have lost count of the number of crocheters who like the brioche tea cosy (or hat) but don't knit and have asked for a crocheted version. I wasn't aware of any crochet that looks like brioche. I put my thinking cap on and fiddled around a bit and this is what I came up with. So just for you folk who wanted it in crochet, here it is - finally. When I was making it several people thought it was knitted and then got a surprise when they saw me using a hook! Whether you make it as a hat or tea cosy I hope it warms your world.
Enjoy! ...Megan SizeApproximately 60cm circumference at the base and 18cm tall in its relaxed state.
Materials2 x 50g balls of Touch Yarns Pure Merino Wool that Knits as 4 ply. To give you an idea it recommends 3.25mm knitting needles and a 50g ball is about 225 metres in length. You could use 1 ball if you're willing to use both tails to make it double. However you can substitute any yarn that gives the required gauge and feels nice to you.4mm crochet hook. Some hat elastic if you want to 'draw in' the base of the cosy and boost its elasticity for repeated journeys on and off your tea pot. How much you need will vary on how much you want to draw it in.
How to do the Special TurnWork the last htr of the row and do NOT turn.Work one tight little chain. Insert your hook from far side to near side through the front loop (it is in fact the back loop in a moment), yarn over hook and draw through the loop. Now turn. Yarn over hook and draw through both loops on hook. Work a dc into the side of the stitch just completed. You have now made a 2-stitch tall substitute for the first htr of the row.
Click the
Note however that this is three stitches tall (it substitutes for a treble - US dc) and does not do the preliminary tight little chain I use in this pattern. Neither does it go through the front (back) loop when making the turn.
Gauge6 rows of htr worked through the back loops is 4cm tall - allowing the 'rib' to relax (that will be 3 'ridges' and 3 'valleys'). 10 htr is 5cm wide.Special Notes – Please read before commencing the pattern The yarn is used DOUBLED throughout. I pull a tail from the centre of each ball. Work through the BACK LOOPS of all stitches unless instructed otherwise. The 'back ridge' is the line of bumps on the back of a chain. It is the loop that does not form the 'V' part of the chain. Working through the back ridge is also demonstrated at the youtube video mentioned above. I make the spout and handle holes slightly different sizes. You can easily change the sizes to suit your teapot by making more or less chains and skipping the corresponding number of stitches. You may wish to make both holes the same size. In that case make sure the handle can fit through. I leave a hole at the top of the cosy for the knob of my teapot lid or plunger to poke through. If you don't want a hole run the last tail through the edge stitches all around a couple of times and draw up securely before tidying away the end.
InstructionsUsing the yarn DOUBLED Ch 37. Turn.Row 1: Ss into the back ridge of the 2nd ch from the hook and the next 4 ch. Dc into the back ridge of the next 8 ch. Htr into the back ridge of the next 23 ch. (36 stitches). It is correct that the row graduates in height. Remember from now on to work in the back loops unless instructed otherwise. Row 2: ST, 22 htr, 8 dc, 3 ss, turn. Do not do a ch. Row 3: Do not skip the first ss, 3 ss, 8 dc, 23 htr. Row 4: ST, 22 htr, 5 dc, 1 ss, turn. Do not do a ch. Row 5: Do not skip the first ss, 1 ss, 5 dc, 23 htr. Row 6: ST, 22 htr, 5dc, 1 dc going through the front loop of the ss from the previous row and the st that ss was worked in, 2 dc, 2 ss, 1 ss going through the front loop of the ss from the earlier row and the st that ss was worked in, 2 ss, 1ch, turn. Row 7: 1 ss into each of the next 5 ss, 8 dc, 23 htr. Rows 2 to 7 form a 'gore'. Repeat them another 5 times.
Opening for SpoutRow 1: ST, 5 htr, 9 ch, skip 9 stitches, 8 htr, 8 dc, 3 ss, turn. Do not do a ch.Row 2: Do not skip the first ss, 3 ss, 8 dc, 23 htr, working into the back ridge of the chains across the spout hole gap. Check now that you have 23 htr. If not then feel free to fudge a st either way to get it back on track. The last two rows were the equivalent of Rows 2 and 3 in the gores. Continue with rows 4 to 7 to complete the gore. Work another 5 gores and then rows 2 to 5 of the gore again.
Opening for HandleRow 1: ST, 5 htr, 12 ch, skip 12 stitches, 5 htr, 5dc, 1 dc going through the front loop of the ss from the previous row and the st that ss was worked in, 2 dc, 2 ss, 1 ss going through the front loop of the ss from the earlier row and the st that ss was worked in, 2 ss, 1ch, turn.Row 2: Do not skip the first ss, 1 ss into each of the 5 ss, 8 dc, 23 htr remembering to working into the back ridge of the chains from the previous row. Once again check that you have the correct number of stitches now. Joining Row: Take the beginning edge of the cosy and bring it up to align with the last row you have worked so that the beginning edge is farthest from you. In a moment, after you turn, it will be closest to you. This next manoeuvre is easier, after you've done the first st, if you face the base of the cosy away from you. Then you will 'join' into the edge on your right, 'work' into the edge on your left. ST, *remove the hook from the loop, insert hook under both loops of the corresponding st on the beginning row from underneath, put loop on hook again and pull it through (yes, you are pulling it 'downwards' – or from the 'outside' to the 'inside'), 1 htr into next st on last row. Repeat from * for a further 21 htr, then continue with this joining method for 8 dc and the final 5 ss.
FinishingThere are no seams. Just put the kettle on and tidy away the ends. By the time your kettle is whistling the cosy should be ready for its First Pot of Tea. Enjoy!
OptionsIf you want to use hat elastic you can either run it through the ends of the rows or do a round of dc evenly all around the bottom of the cosy to make a tiny casing for the elastic. Evaluate your spout and handle holes. The finish is already very tidy (due to working in the back ridge of the chains) but you may wish to work another round of dc as well.If you'd like to shag the cosy to make it extra-thick and self-lined there are convenient lines of loops available on both sides. To learn how to shag you can find instructions in Favorite Mittens, Best Traditional Mitten Patterns from Fox & Geese & Fences, Flying Geese and Partridge Feet by Robin Hansen, published by Down East Books. The copy I have was printed in 2005.
© Megan Mills, 4 January 2010 |
XXX | |||||||||||||||
 in the window below and with a little luck you'll see a video tutorial demonstrating how to work a dc into the side of a stitch.