|
|
 Hand Warmers |
 Mitred Corner |
 Crocheted Ribbing Seam Tutorial |
 Nappy Cake |
 Tiramisu Recipe |
 Bowl Cover |
 Blocking Howto |
 Rose Howto |
 Bowl Cover |
 Collar |
 Crochet Curved Edging |
|
Filet Mat |
|
Filet Mat |
 Estonian Lace |
 Counterpane |
 Quick Knit Poppy |
 Meggy Square |
 Slippers |
 Flat Slippers |
 Crochet Beret |
 Prime Rib Hat |
 Bicolour Hat |
 Bicolour Cosy |
 Tea Cosy |
 Tissue box cover |
|
Baby Jacket |
 Seamless Bootee |
 Mitres Tutorial |
 Crochet Butterfly |
 Crochet Pelerine |
 Swan Doilies |
 Crochet Brioche Hat |
 Crochet Brioche Tea Cosy |
 Puffy Rib Cosy |
 Crochet Coffee Plunger Cosy |
 Rosy Cosy |
 Roses Afghan |
 Hexagonal Motif |
 Crochet Rose |
 dc HowTo |
 Tutorials Tidy Ends Change Colours Back Ridge Starting Chain Mystery Stitch Knitting: Buttonholes Twice Knit Increase/Decrease |
 Crochet Square Tutorial |
 Tatting Bobbin Lengths Chart |
 Crochet Square |
|
Granny Rectangle |
 Crochet Bib |
  Soccasins & Mary Janes |
 Crochet Bootee |
 Crochet Bootee |
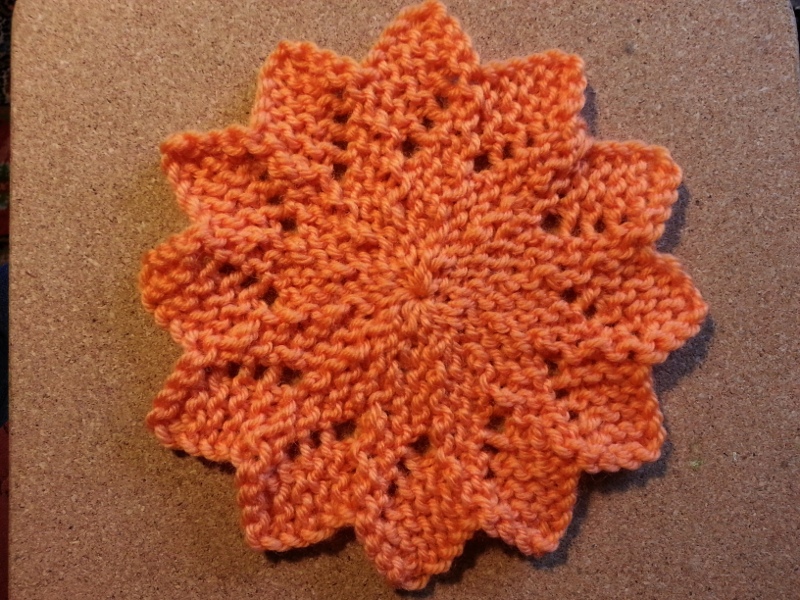
A pattern for knitting teachersA free knitting pattern by Megan Mills © 2015megan@kiwi.gen.nz 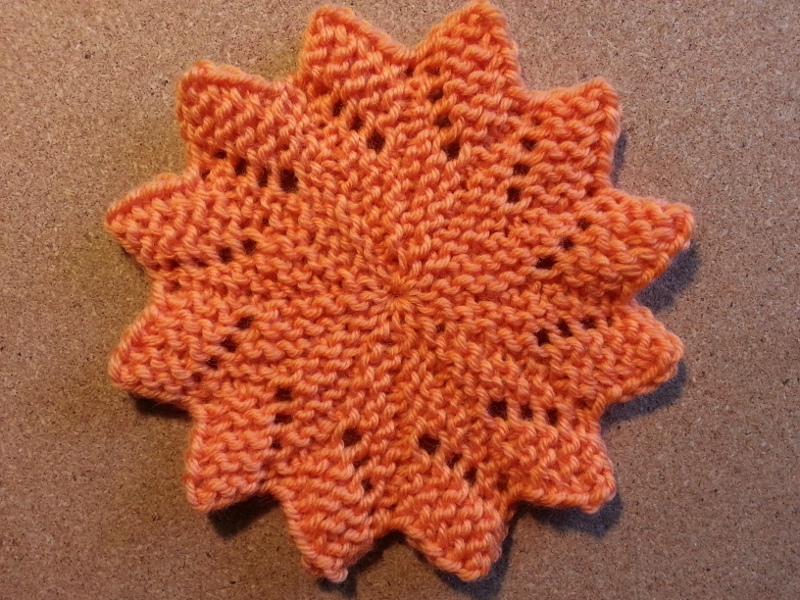 Do you teach people to knit and want something more interesting than a scarf or peggy square for their first project? I wanted something that can be completed quickly and doesn't use much wool, is interesting, just a little bit magical and gives beginners a chance to practice something over and over so they get really good at it. There's nothing as encouraging for a beginner as seeing that they've really made progress and actually finished something. I found the “Almost lost wash-cloth” that appears to be a traditional pattern handed down from who-knows-when. You can read all about it and see the traditional pattern here. It fits most of the criteria I was looking for but I found it a bit too big for beginners, and it needed a few more techniques to make it more challenging and fun so it keeps the beginner's attention. So I've reduced it to 12 points instead of 14 (all the better for dividing it up if you want to use different colours), decreased the diameter and added these extra techniques:
The 12 wedges let you teach a variety of short row techniques and you can also teach a variety of selvedges as each point has it's own selvedge. If you've ever wanted a good project for teaching “knitting back backwards” this is it. Do you want to teach purl? No problem – the pattern still works if you do the garter stitch in all purl. Why not teach one in all-knit and the other in all-purl? What can you use it for? Quite a lot! In knitting cotton it makes a fine wash cloth, in wool it makes a good coaster for a mug, or “hotpad” for a teapot (even better for that if you join two together). If you graft it together after 3, 4, 5 or 6 wedges you can make a variety of trumpets for knitted flowers (using finer yarns) and anything from there on up to all 12 wedges will make a skirt for a small doll. With a little adaptation the principles used here can be pressed into service making cuffs for gauntlet-style wrist-warmers and gloves - it will work very well with the patterns for sideways knitted garter stitch gloves. The techniques used here are also used for beautiful knitted lace doilies - I have some lovely examples in a book called (what else?) Knitted Lace Doilies by Tessa Lorant, which can in turn be easily adapted to make lace collars. 12-point short-row garter stitch van Dyke medallion, worked flat
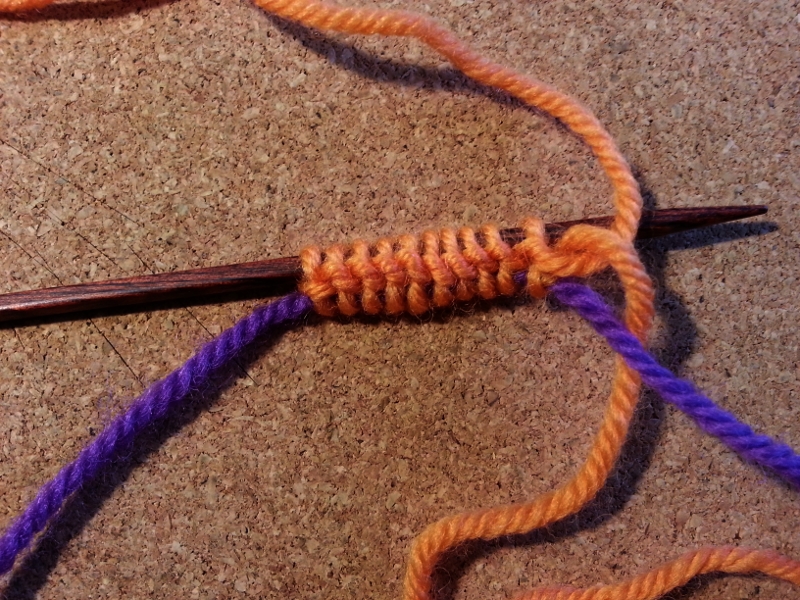
Notes: When you count stitches after you have started doing GSR turns, count the double strands of the GSR as ONE stitch, not two. When you do the JMCO you will get all stitches mounted the same way (relieving you of the need to work the stitches on one needle through the back loop on the first row) if you wrap the:
Set-up Using JMCO as a provisional cast on, cast 10 sts onto each needle. Put the sts on the needle that has the tail onto a spare piece of wool or small stitch holder.
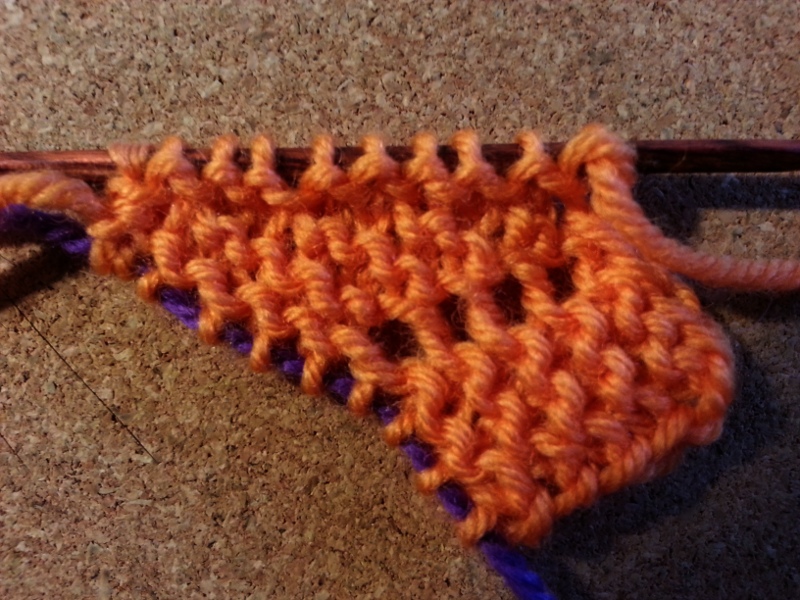
Make sure that the bumps from JMCO are facing towards you at the start of this row so that you will get continuous garter stitch. On the needle that has the ball yarn, S1 k-wise, K9, turn. First point Row 1: S1 p-wise, K3, YO, K5, turn. (11 sts all together) Rows 2, 4, 6, 8: Using GSR technique S1, K to end, turn. (If you prefer you can simply turn without doing anything special like a GSR or wrap-and-turn.) Row 3: S1 p-wise, K3, YO, K4, turn. (12 sts all together) Row 5: S1 p-wise, K3, YO, K3, turn. (13 sts all together) Row 7: S1 p-wise, K3, YO, K2, turn. (14 sts all together)
Row 9: Making sure that you slip the first st p-wise, cast off 4 using the suspended cast off, K to end of row working both strands of the GSR slipped stitches together as you go, turn. (10 sts) Row 10: S1 k-wise, K to end, turn. (10 sts)
2nd to 11th points Last point Repeat rows 1 to 9 again. Row 10: Making sure that you slip the first st p-wise, cast off 4 using the suspended cast-off. Cut off a tail long enough to graft your last row (5 times the width of the 10 sts across your needle should be plenty) and pull the tail right through the last st you cast off. Thread it onto a wool needle. If you inadvertently tighten your last cast-off st then loosen it up again now so that it matches all the other cast-off sts.
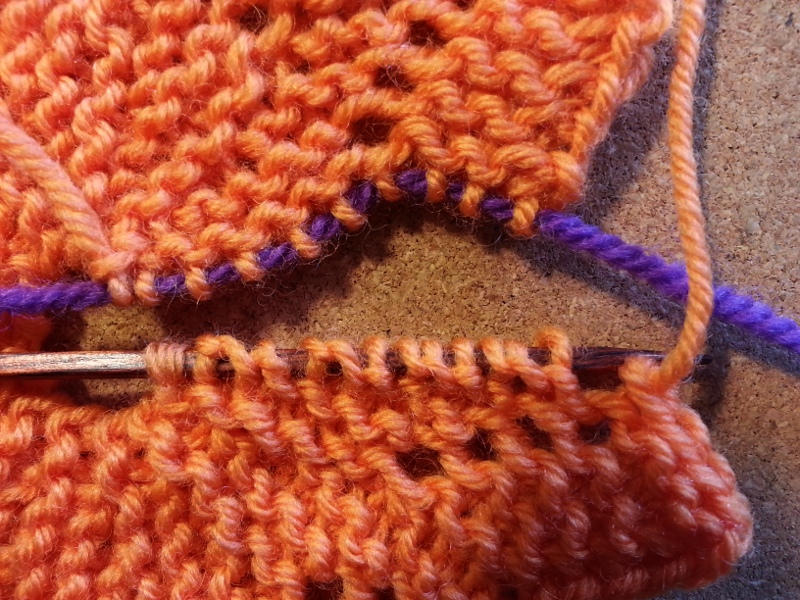
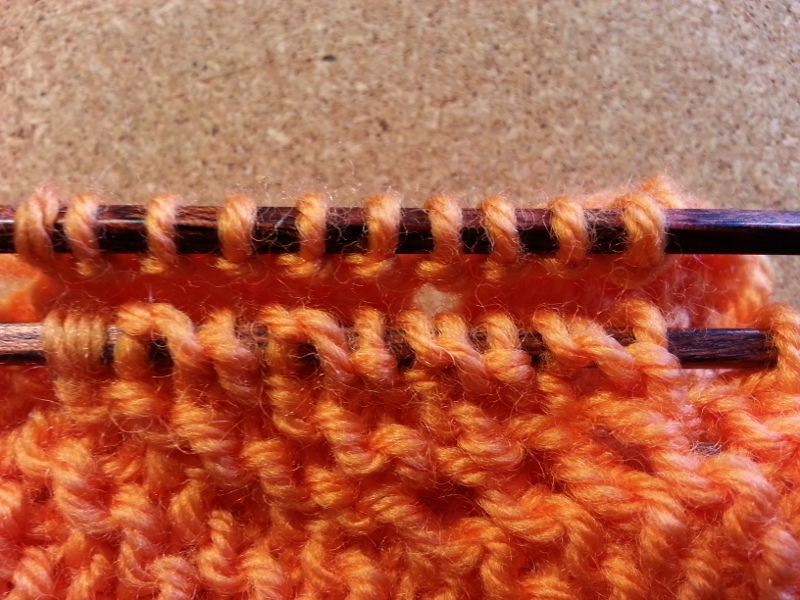
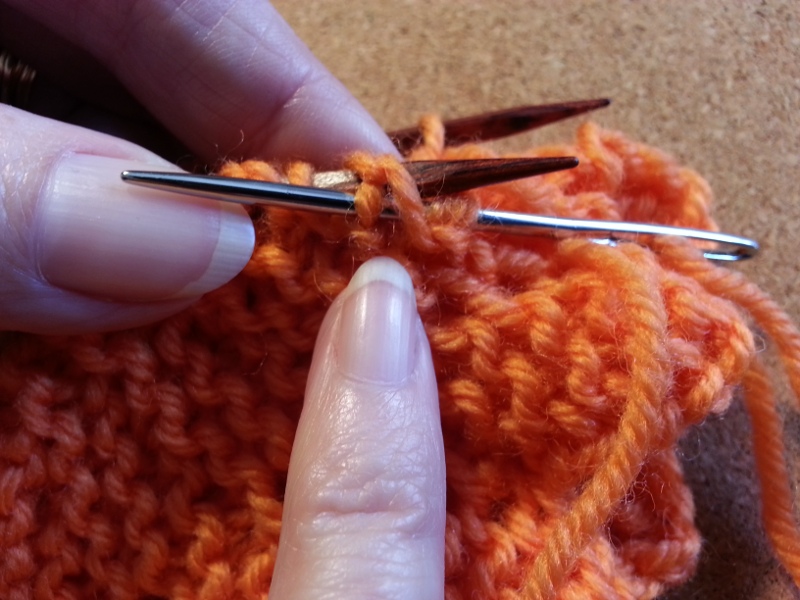
Finishing Place the 10 live sts from your thread or holder onto a knitting needle so that the needle point ends up at the outside edge of your medallion. Hold this needle behind the other.
Using the tail you've just cut from the ball Garter St graft (Kitchener St) the remaining sts on your last row to the 10 sts from your provisional cast on on the back needle. You are working from the outside of the wash-cloth to the middle. Make sure as you do this that you pick up both strands of GSR slipped stitches from your previous row.
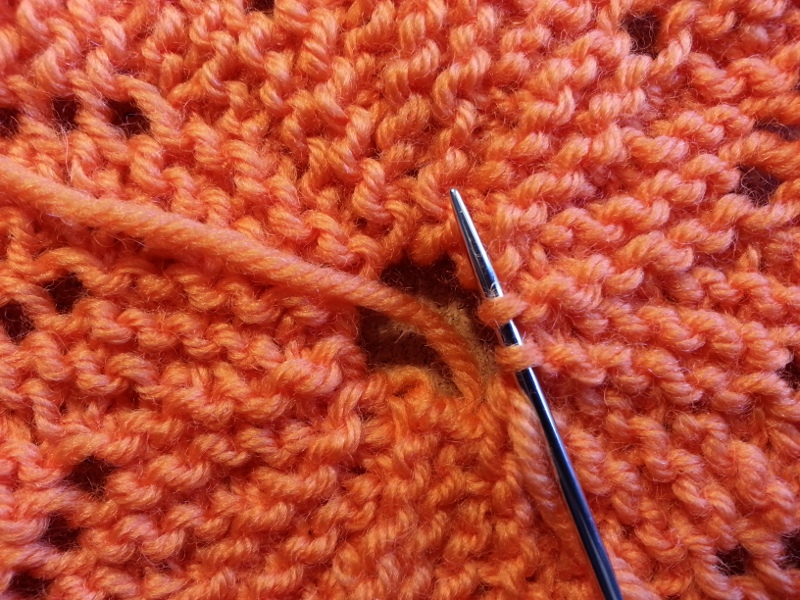
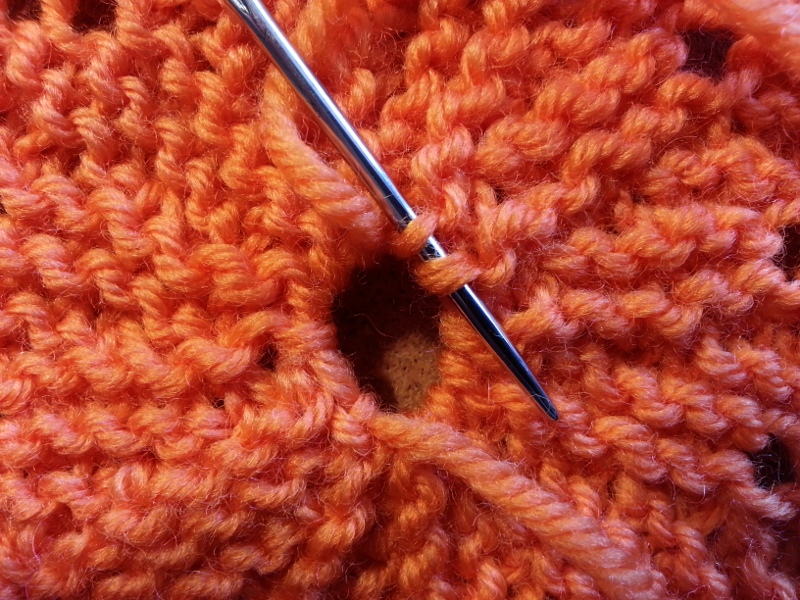
Pick up the selvedge “pips” from all around the inner selvedge in one direction with one tail and then repeat in the other direction with the other tail. Take both tails to the wrong side of the work and use them to draw the centre ring closed.
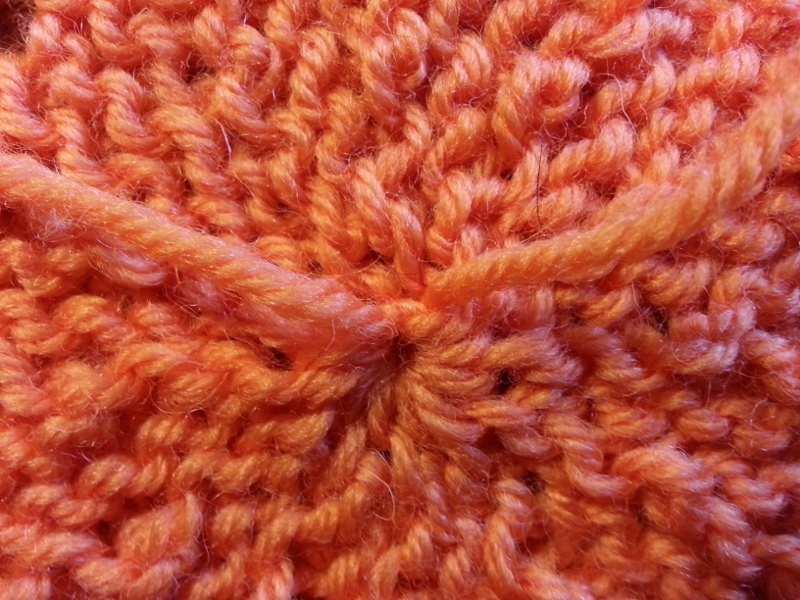
Tie the two tails together in a half knot (or square knot, if you prefer), weave the tails into the back of the work.
Do not fully trim the tails until after the first wash.
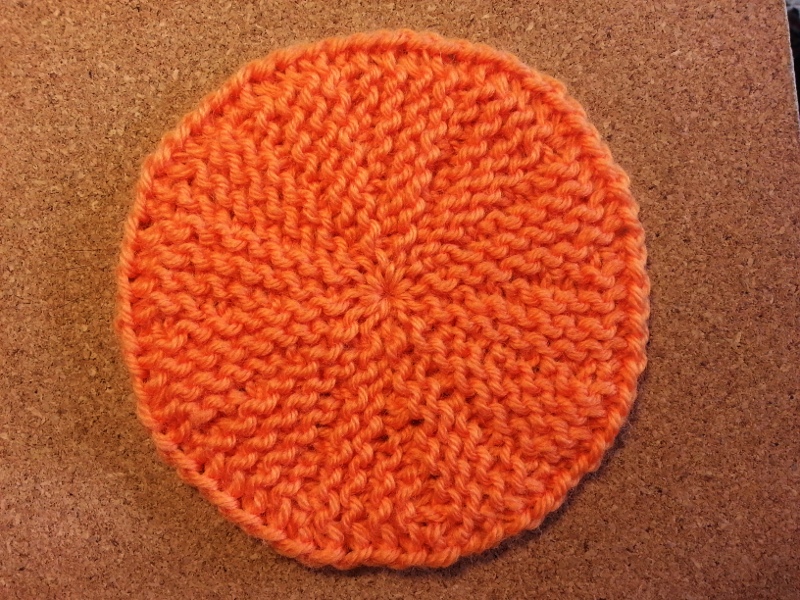
Variation
12-wedge short-row garter stitch circular medallion, worked flatSet-upUsing JMCO as a provisional cast on, cast 10 sts onto each needle. Put the sts on the needle that has the tail onto a spare piece of wool or small stitch holder. Make sure that the bumps from JMCO are facing towards you at the start of this row so that you will get continuous garter stitch. On the needle that has the ball yarn, S1 k-wise, K9, turn. First point Row 1: S1 p-wise, K8, turn. Rows 2, 4, 6, 8: Using GSR technique S1, K to end, turn. (If you prefer you can simply turn without doing anything special like a GSR or wrap-and-turn.) Row 3: S1 p-wise, K6, turn. Row 5: S1 p-wise, K4, turn. Row 7: S1 p-wise, K2, turn. Row 9: S1 p-wise, K to end of row working both strands of the GSR slipped stitches together as you go, turn. Row 10: S1 k-wise, K to end, turn. 2nd to 11th points Repeat rows 1 to 10 another 10 times (11 points made). Last point Repeat rows 1 to 9 again. Row 10: Cut off a tail long enough to graft your last row (5 times the width of the 10 sts across your needle should be plenty) and pull the tail right through. Thread it onto a wool needle. Finishing Place the 10 live sts from your thread or holder onto a knitting needle so that the needle point ends up at the outside edge of your medallion. Hold this needle behind the other. Using the tail you've just cut from the ball Garter St graft (Kitchener St) the remaining sts on your last row to the 10 sts from your provisional cast on on the back needle. You are working from the outside of the wash-cloth to the middle. Make sure as you do this that you pick up both strands of GSR slipped stitches from your previous row. Pick up the selvedge “pips” from all around the inner selvedge in one direction with one tail and then repeat in the other direction with the other tail. Take both tails to the wrong side of the work and use them to draw the centre ring closed. Tie the two tails together in a half knot (or square knot, if you prefer), weave the tails into the back of the work. Do not fully trim the tails until after the first wash.
© Megan Mills, 1st June 2015 |
||||||||||||||||||